
Deck Building Packages: A Beginners Guide To Common Card Combinations
By Timothy Cathcart
When deckbuilding for Ashes Reborn you may find yourself putting together a deck with an awesome new idea, with card combos that work really nicely together. Then when you play the deck it simply underperforms, unable to pull out ahead.
Don’t despair! This doesn’t actually mean that your idea for a deck necessary sucks or your card interaction inclusion is a bad one. However it is incredibly difficult for your deck to be an entirely new mix of cards and also be competitively viable.
Sometimes an entirely new archetype of deck is created by a player, but more often new successful decks are remixes, a bit of a new idea along with a bit of an old idea.
This article aims to give you an overview of several tried and tested deck building packages, combinations of cards that often are added to a deck to give it an edge or bring it close to a win condition. Combine these old ideas with your new ideas to help your cool deck ideas shine!
Not everything in a package is necessary, mix and match different parts depending on how much you want to lean into the archetype. For every package there is a variation that only uses some of the mentioned cards. Ashes is a game of spending dice, so most packages focus on the exploitation of a particular card that is particularly high value for dice.
Time Value Spellboard
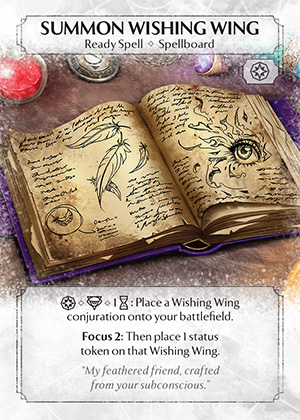

This spellboard package is all about efficient single dice allies with tokens and card draw.
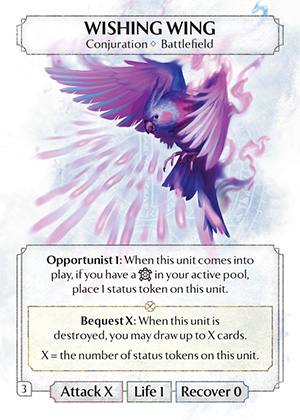
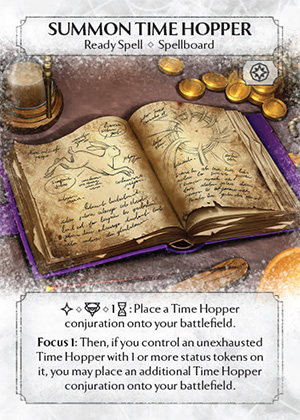
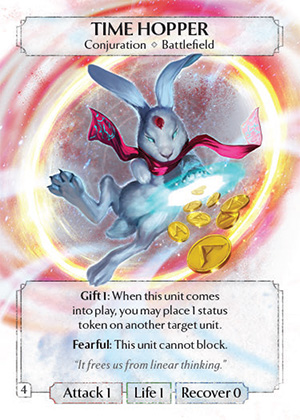
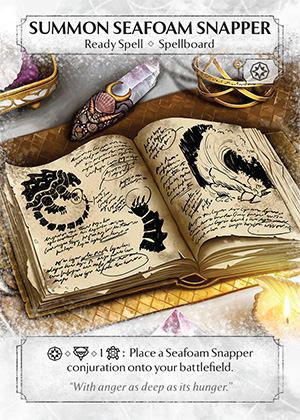
The key card is Summon Wishing Wing which gets more efficient the more you can summon those pesky birds and add tokens to them. Use Summon Time Hopper to give status tokens to the Wishing Wings. Having problems with all these units clogging up your battlefield? Use Summon Seafoam Snapper to eat your own Wishing Wing after it's exhausted and guarantee that card draw. All the card draw of the Wishing Wings should enable you to play extra books from your deck and unlock the focus abilities of the Wishing Wings themselves as well as the Time Hoppers.
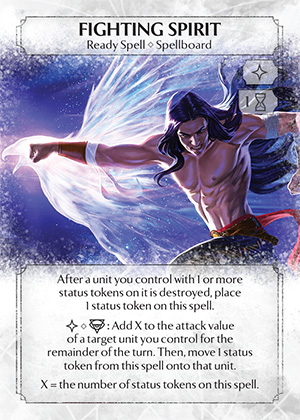
All these 1 health units can be exposed to ping damage, what is your actual win condition here? Use Fighting Spirit to load up for an attack boost. With enough tokens only a couple of massive attacks from a boosted unit might be what is needed to clinch victory.
This package has a large number of possible cards, so many variations of combinations of these cards exist. You can even run Time Hopper and Seafoam Snapper without Wishing Wing. Another card often paired is Summon Tidal Crab, to add even more tokens to your units. Stand Still can help you land your big attacks and Accelerate can enable you to string together Time Hopper and Fighting Spirit side actions.
If you do run a spellboard like this with many cheap unit summons, consider including Gates Thrown Open in your first five to summon everything twice in round 1. Otherwise you may find your first five is too cheap and you'll have unspent leftover dice in round 1 which is never a good idea!
PACT
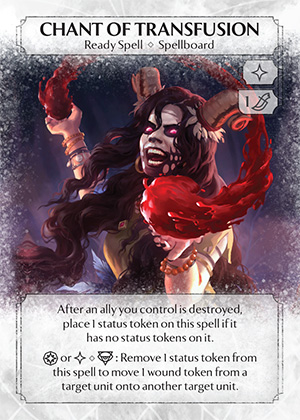
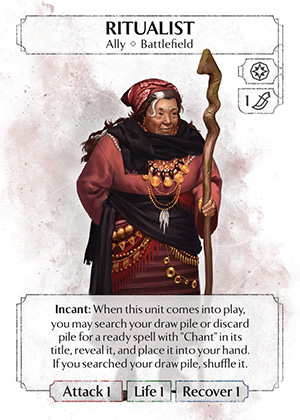
PACT is so called because of the interaction between Phoenix Attendant and Chant of Transfusion but the key card is the chant, exploiting the value of Chant of Transfusion is a powerful package.
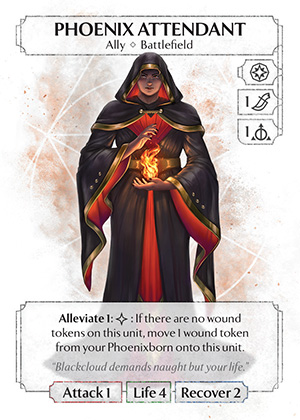
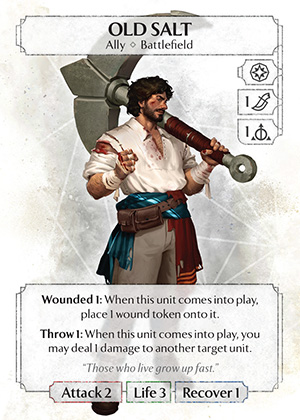
Start round 1 with either a single copy of Transfusion or by playing Ritualist to pull an extra chant from your deck you can even start with 2. With an ally heavy deck triggering the chants with an ally death shouldn't be too difficult (Though you may wish to include some ways to ensure your allies die like Blood Chains.) Use the Phoenix Attendant side action to heal damage and the Chant of Transfusion main action to immediately move that damage onto an enemy. The amount of healing and damage here can be extremely efficient. For a more aggressive play, play Old Salt to deal 1 damage to an enemy unit before immediately using the side action of the Chant of Transfusion to move the default damage Old Salt enters play with onto the same enemy. Taking out a 2 health enemy has never been more dice efficient!
There are a lots of combinations of ceremonial allies that can help fuel the chant machine. One to keep an eye on is Blood Archer, who's side action damage can also combo with Transfusion. Since you're flinging wounds around and even ignore armour while you're at it, Fester is also a lovely removal option.
Bear Bypass
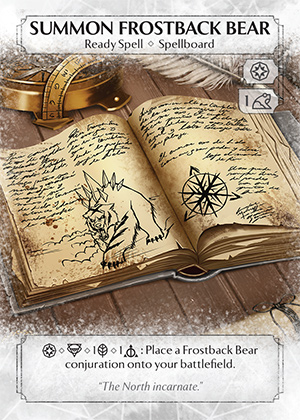
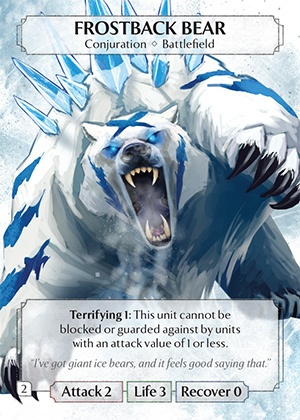
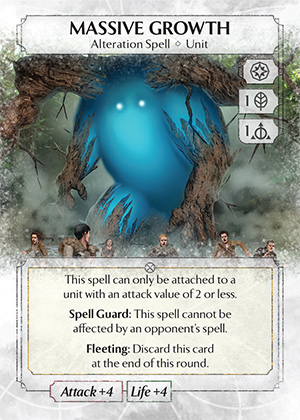
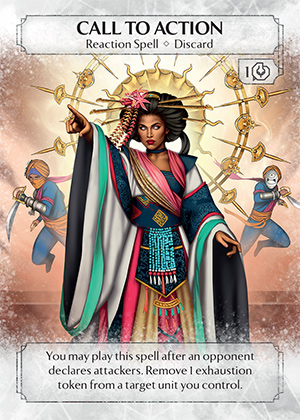

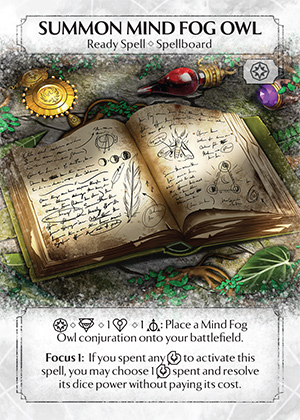
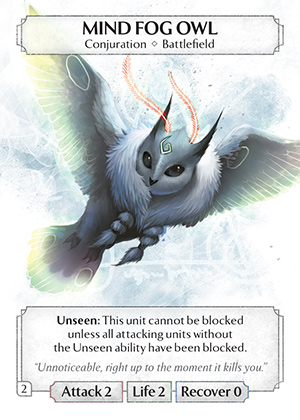
Summon Frostback Bear on its own it is a value machine. On round 1 three dice for a fairly large body is slightly underpowered compared to a three cost ally, but on round 2 and onwards two dice for the mighty Frostback Bear is such great value. The Bear also comes with an built-in win condition, Terrifying 1 which can be consistantly used to deal damage over the heads of smaller enemy blockers. With 2 starting attack the bear is a prime candidate for Massive Growth to deal a whopping 6 damage to the enemy Phoneixborn should you successfully bypass their defences. Want even more value? Use the cheapest option Call to Action or another similar unexhaustion card to attack twice with the massive bear. All this investment in a single unit can be dangerous however so you may want to run Golden Veil to prevent your costly conjuration combo from getting hit by a removal spell. Want to spread your bypass damage between two units? Use Summon Mind Fog Owl and attack in tandem with your bear. If the Frostback Bear cannot be blocked then neither can the Mind Fog Owl!
If you have charm dice to spare, don't forget you can slip a sneaky Charm Dice Power into the mix and debuff an enemy blocker's attack which would otherwise be high enough to block the bear. There are also more additional options than ever to boost the attacks of your units. Use Wallop to unexpectedly hit harder than your opponent was expecting and Clashing Tempers to combo your attack with removal options.
Burn
The most common commination of cards referred to as a card package is the "Burn Package", cards that define burn in Ashes Reborn.
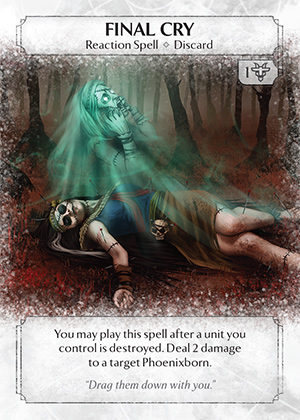
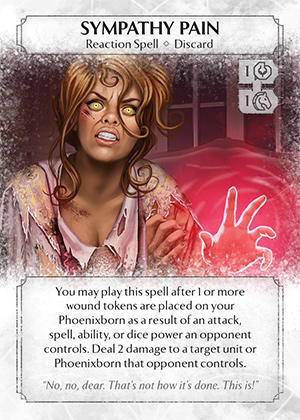
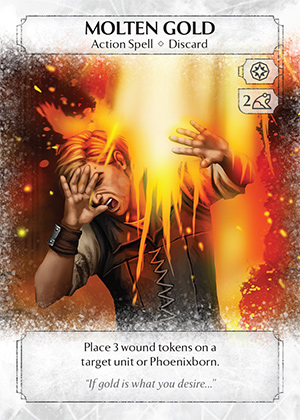
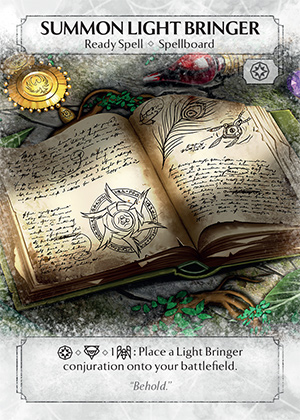
Nature, Ceremonial, Charm and Sympathy, these are the dice types each with access to a high efficiency burn card. Final Cry offers 2 damage for 1 dice and requires a unit death to trigger. Sympathy Pain requires an opponent to deal you damage and offers the same ratio, 2 damage for 1 dice. Both of these requirements are usually easy to trigger, though for Final Cry you may wish to pack effects that will destroy your own units like Reclaim Soul, and for Sympathy Pain you may wish to ensure your opponent attacks you with Summon Light Bringer, an attack you can immediately Phoenixborn Guard to trigger the pain. Molten Gold offers even more damage, technically less dice efficient at 3 damage for 2 dice, yet it more than makes up for it by being more action and card efficient.
You can include just Molten Gold in your deck for closing out games or go all in and stack your deck with 3 of each card for the full burn package. Just remember, this powerful burn can be high variance simply because unlike other games there aren't enough powerful burn cards like these three to fill out an entire deck. You'll have a different round 2 plan for when you don't draw many of your burn cards. I also recommend caution when including burn cards in your first five. You may find that spending dice early on burn will just put you too far behind on the fight for the battlefield.
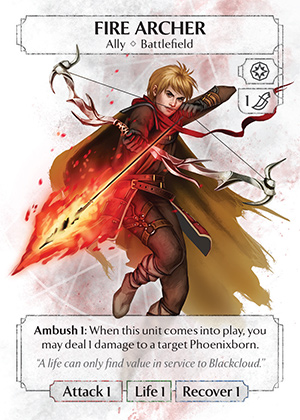
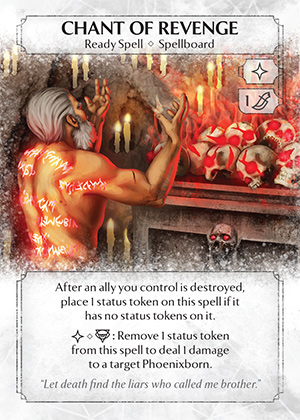
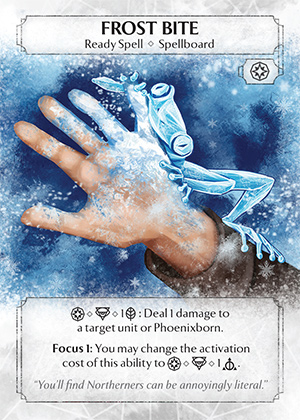
Less powerful but more consistent, slower burn makes up a parallel collection of cards. Fire Archer offers both a unit and 1 burn for 1 dice. Once in the discard, it can be recurred and played, any time you can use a Ceremonial Dice Power side action. This is an even worse ratio of 1 burn for 2 total dice, but it could be just the 1 extra damage you need to win the game. Chant of Revenge promises to offer a base value proposition of 1 dice for 1 burn, with each round you can trigger it afterwards making it even better. Spending dice however on the chant in round 1 won't help you with control of the battlefield so the efficiency proposition can be a double edged sword. Frost Bite offers 1 dice for 1 burn and with the focus effect you can spend whatever dice you want on it. Most decks that use Frost Bite run three copies of it in the deck and leave a spellboard slot open for drawing and playing it in later rounds.
With slower, less dice efficient burn cards it will take longer to kill your opponent with burn, but this is offset by the fact that both spellboard cards with stick around from round to round, and the Fire Archer can be recurred. Feel free to try any combinations of these burn cards to supplement your unique deck strategy.
Aggressive Light Bringer Opener
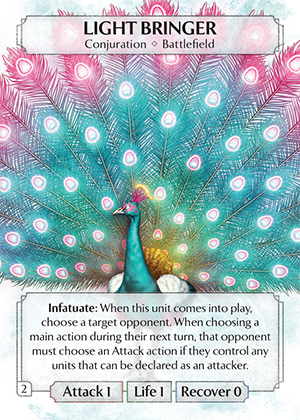
Some decks just want to get in early with a lot of damage before their opponent has time to react. There are many variations of the early ally aggressive opener but they all follow the same logic. In Ashes it takes time to first play a summon spell and then use it to summon a conjuration. Can you race your opponent and get in a massive attack before they have time to set up?
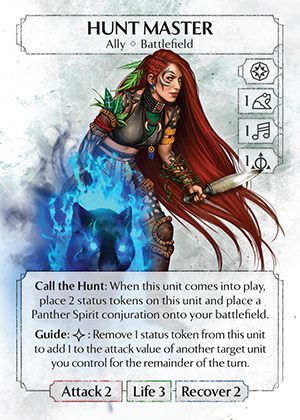
Choose to go first if you can and play the key card to this strategy, Summon Light Bringer. Hopefully your opponent won't quite know what's afoot yet and will play something slow like a conjuration summoning spellboard card of their own. Then play an high attacking ally, like Hunt Master or Grave Knight. Your opponent will want to block your big attacker with something, but whether they play an ally or summon a conjuration, on your turn you can activate Summon Light Bringer and force them to attack with their new blocker. Use your Phoneixborn Guard on whatever they attack with and then swing back at them with all your attackers, a total of 5 attack usually with the Light Bringer included.
There are many variations on this early Light Bringer strategy including those with more swarming attackers like Raptor Herder and Summon Vampire Bat. You can commit these four dice to the opening attack of 5 damage and it still leaves you with six more dice for whatever else you want to do with your first five.
Realm of the Absurd

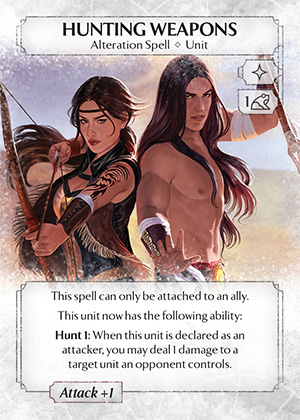
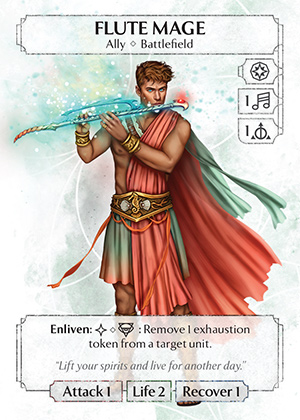

This early damage combo is even more all in on attacking your opponent's Phoenixborn directly and many players have tried a variation of this first five. The key card here is Realm Walker which exhausts whatever unit your opponent tries to block you with, If your opponent manages to play 2 blockers then fear not, attach Hunting Weapons to your Realm Walker just before attacking to both take out a 1 health blocker and force your opponent to instead exhaust the higher health blocker, as well as deal an extra point of damage when your attack hits. Throw in an Unexhaust card like Flute Mage to get double the value out of your Realm Walker, and Golden Veil to protect your investment into a single unit.
Just like with any of these strategies you don't have to use all the cards of the combo to get good value. Just be careful with the Realm Walker's 3 life total which put them in unfortunate range of 3 damage removal like Molten Gold.
Creeper
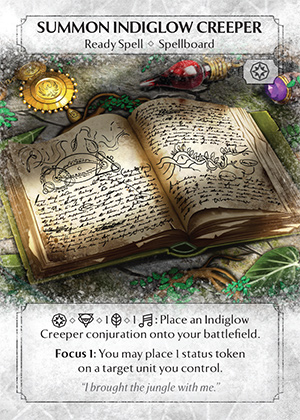
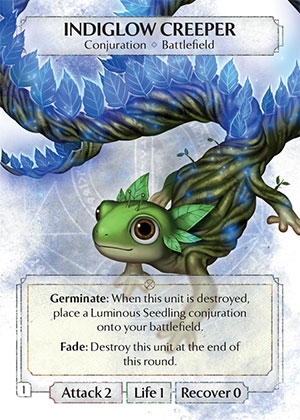
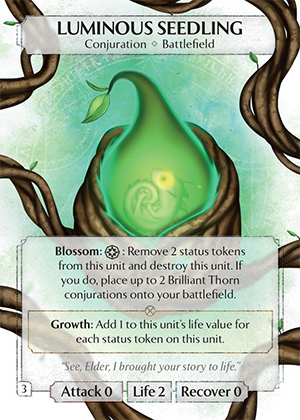

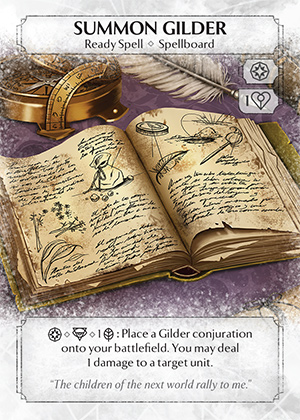
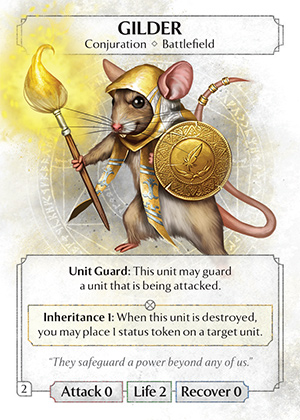
The potential value of Summon Indiglow Creeper is pretty insane. What starts off as a fairly humble small unit can turn into 2 massive units, all for the price of 2 dice. If you can consistantly blossom your Luminous Seedlings into Brilliant Thorns then you'll most likely command the battlefield, so its no surprise that many decks make this value proposition a goal of their deck. Use Summon Gilder to provide both unit guard against attacks to your otherwise defenceless Luminous Seedlings and fuel to grow them when your Gilder dies and bestows its status token inheritance. If your opponent refuses to kill your Indiglow Creeper conjuration for fear of the Brilliant Thorns, use Summon Seafoam Snapper to do it yourself.
Snapper isn't the only way to kill your own creeper of course! Guilt Link is another favourite for the job. So long as you can get a token on it you'll also force your opponent to destroy a unit while you're more than happy to destroy your Creeper and get a Seedling. Check out Redirect and Seeds of Aggression for other options of gaining some kind of benefit while killing your own creeper.
There are lots of different ways of getting status tokens onto your Luminous Seedlings. Grabbing more copies of your Summon Indiglow Creeper to unlock its focus effect it one. Using Summon Tidal Crab to offload tokens directly is another. Try out a variation of the creeper deck and see how you can incorporate its powerful value into your plan.
Fallen
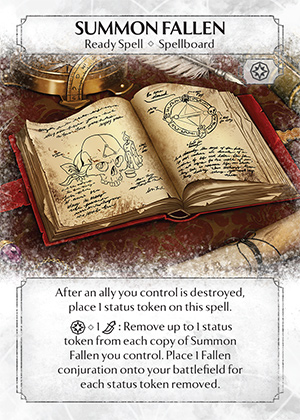
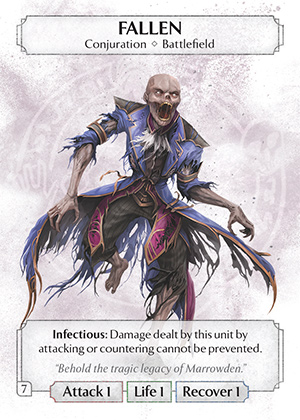
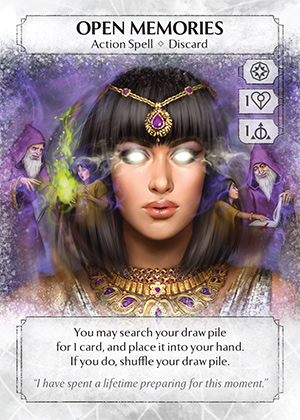
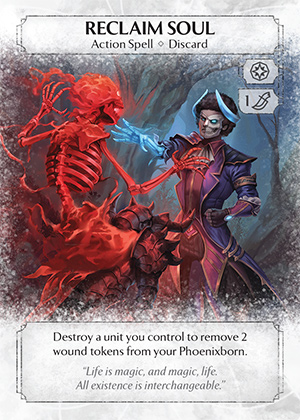
The bane of many a despairing player, Summon Fallen has the potential to reward its owner with an overwhelming large number of zombie units. At first glance, Summon Fallen operates like a chant, triggering with a status token whenever an ally dies and allowing you to spend that token for a benefit, in this case summoning a Fallen unit. However its unbelievable power ceiling is revealed upon closer inspection. Unlike a chant, you do not have to exhaust the card to spend the token, and the number of Fallen you get scales with the number of copies you have in play. That means with all 3 copies of Summon Fallen in play, each time an ally dies you can summon 3 units for just 1 dice. It's easy to see why this incredible value engine can be a go-to when designing a deck. Use Open Memories to get your second copy of the ready spell in play as quickly as possible in round 1. Then start pumping out allies, and each time one dies you get the ability to summon 2 zombies. If your opponent thinks they are clever and avoids killing your allies, include cards like Reclaim Soul to kill your own allies and trigger your fallen books.
Many players have given their own unique twist to a fallen deck. How will you get you hands on the second copy from your deck, or even better still, the third? Be careful though, you may run out of allies to sacrifice to the machinations of war and you might simply get destroyed by your opponent before you have time to setup your value engine.
Raptor Herder Spam

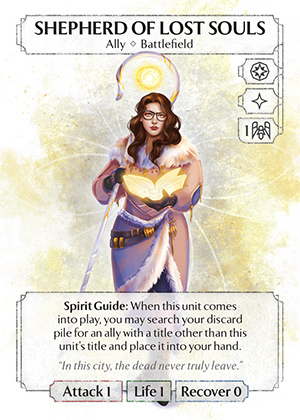
Which unit is the best unit? For the cheap cost of only a single dice, Raptor Herder might offer the best value for money. 3 attack spread between 2 units won't suit every deck, but there is no denying the aggressive power of playing Raptor Herder over and over again. Opponent killed your Raptor Herder? Use Ceremonial Dice Power Recursion or play Shepherd of Lost Souls and get it back into hand to play again. Opponent doesn't want to kill your Raptor Herder? Use one of the mount cards, like Summon Cerasaurus Mount to create a powerful unit and put the Raptor Herder underneath it. When your opponent inevitably kills your mount, you get to play Raptor Herder again! There are lots of other creative ways to replay this extremely efficient ally, a useful tool to have in your deckbuilding arsenal.
Conclusion
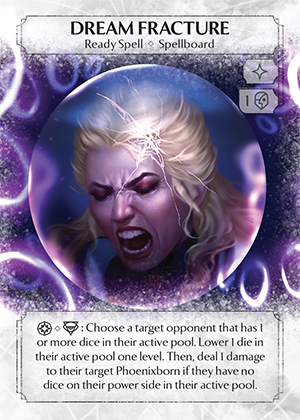
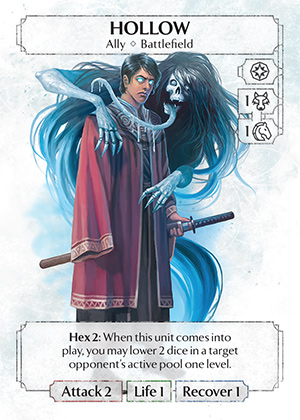
There are of course many more combinations of cards that are often seen together in great Ashes Reborn decks. In particular, yet unmentioned are spindown and mill archetypes, with fun powerful combinations, like mill spellboards of Abundance, Summon Three-Eyed Owl and Summon Orchid Dove as well as spindown combos with cards like Dreamlock Mage, Dream Fracture and Hollow. However I'm a little less confident on exactly how to make these packages work best in the current meta.

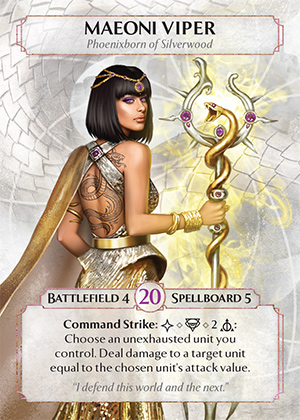
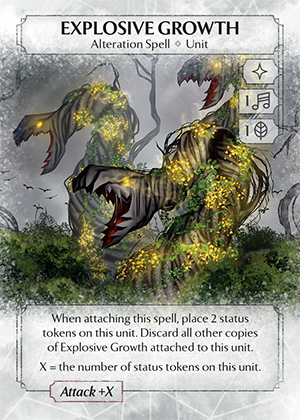
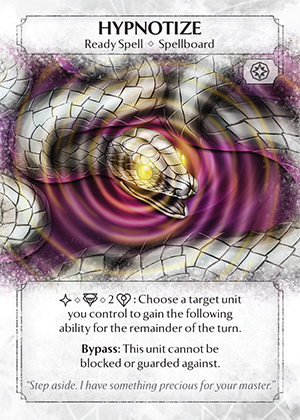
Some Phoenixborn also have specific packages like Maeoni who is often paired with some combination of Summon Gilder, Explosive Growth, Hypnotize, Root Armor and of course Golden Veil.
Hopefully this has been a helpful introduction to some of the common powerful combinations and packages of cards in Ashes Reborn. What combination of cards do you think works well together across a range of different decks? Is there a card I haven't mentioned with amazing dice efficiency, ready to be exploited? Let me know on the Ashes Discord!
No comments to display
No comments to display